METHOD
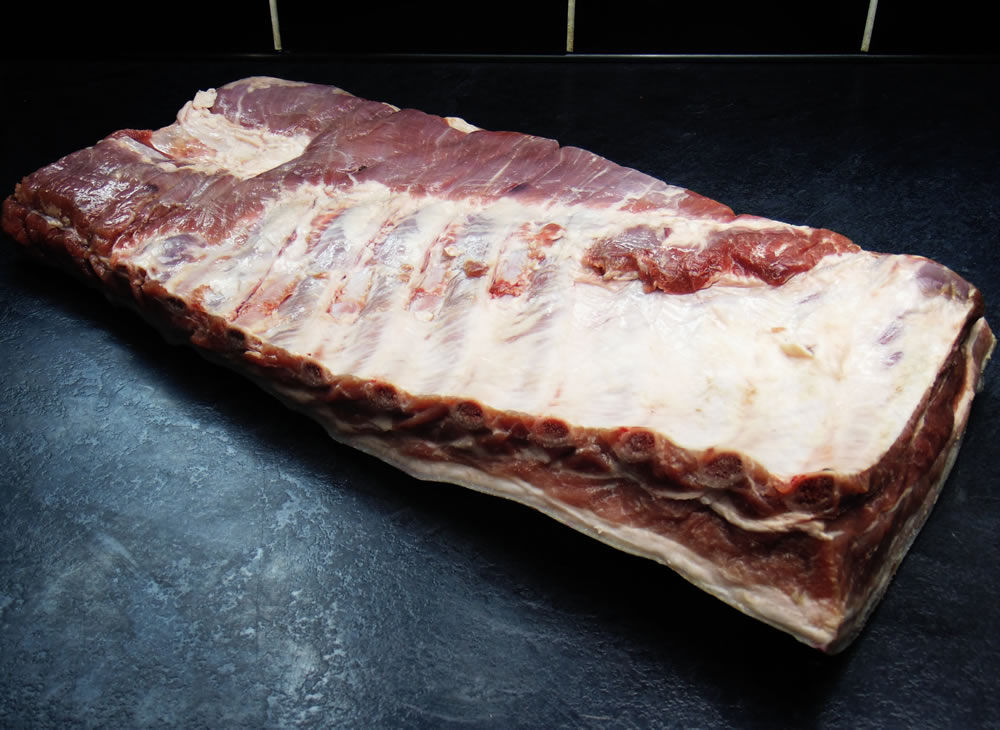
Butchering a whole pork belly weighing 5-6 kg into joints and belly ribs is a task that requires precision and an understanding of the pork anatomy. Here are the steps you can follow:
Butchering Steps
- Lay the Belly Skin-side Down: Place the pork belly on the cutting board with the skin-side down.
- Identify the Ribs: Feel for the ribs that run along one side of the belly. This is where you'll separate the belly ribs.
- Separating the Belly Ribs:
- Make a vertical cut down alongside the ribs, following their curve.
- Use your boning knife to gently separate the meat from the ribs.
- Once separated, you can further cut the ribs into smaller sections if required.
- Trimming for Joints:
- Examine the remaining belly. You’ll notice it’s mostly flat with a layer of fat and meat.
- Decide on the size of the joints you require.
- Cutting the Joints:
- Make horizontal cuts across the belly to create joints of your desired size.
- Ensure each cut is clean and straight.
- Final Touches:
- Trim any excess fat or sinew to tidy up the joints.
- If desired, score the skin on the joints to help with cooking.
- Storage and Handling:
- Immediately store the cut pieces at the correct temperature, adhering to food safety guidelines.
- Label and date each piece if you're freezing them.
Rolling pork belly joints is a common practice in commercial butchery, primarily aimed at creating a more uniform, aesthetically pleasing product that cooks evenly. The process involves rolling the meat into a tight cylinder and securing it, typically with butcher's twine. Here’s how you can do it:
Equipment Needed
- Butcher’s Twine: Strong, food-safe twine for tying the rolled pork.
- Sharp Knife: For any additional trimming.
- Cutting Board: To lay out and prepare the pork.
Steps for Rolling Pork Belly Joints
- Prepare the Pork Belly:
- If you haven't already, remove the rib bones from the pork belly.
- Trim any excess fat or sinew, but remember that some fat is desirable as it keeps the joint moist during cooking.
- Skin Scoring (Optional):
- If your joint includes skin, score it lightly. This helps the fat render out during cooking and makes the skin easier to eat.
- Score in a diagonal or criss-cross pattern, ensuring not to cut too deeply into the meat.
- Seasoning (Optional):
- You can season the inside of the pork belly with herbs, spices, or a rub to enhance flavour. This step is optional and depends on your recipe or preference.
- Rolling the Joint:
- Lay the pork belly flat, skin-side down, on the cutting board.
- Begin rolling from one of the longer edges if you want a longer, thinner joint, or from a shorter edge for a shorter, thicker joint.
- Roll it as tightly as possible to ensure even cooking and a good presentation.
- Tying the Joint:
- Cut several lengths of butcher’s twine.
- Tie the rolled pork belly at regular intervals (about 2-3 inches apart) to secure the roll. The number of ties will depend on the length of the joint.
- Ensure the twine is tight enough to hold the roll together but not so tight that it cuts deeply into the meat.
- Final Preparation:
- Trim any loose ends of twine.
- If you haven’t scored the skin earlier, you can do it now, being careful not to cut the twine.
- Storage and Handling:
- Store the rolled joints in a refrigerated environment or freezer, adhering to food safety standards.
- Label and date the joints.
Additional Tips
- Even Thickness: Try to maintain an even thickness throughout the roll for consistent cooking.
- Twine Technique: Learn a secure tying technique. A butcher's knot is commonly used for its reliability and ease of untying after cooking.
- Customization: The size of the roll can be customized based on your needs.
Rolling joints is both an art and a science. It not only makes the pork belly easier to handle and cook but also enhances its appearance, making it more appealing.
Remember, the key to successful butchering is patience, precision, and respect for the meat. Each cut should be deliberate and mindful of the anatomy of the pork.